- Konu Yazar
- #1
The XK20 laser streamlines alignment with guided workflows, one-step testing, and compliance-ready data, boosting speed and confidence in machine tool assembly.
Renishaw has launched the XK20 alignment laser, designed to simplify and accelerate machine tool assembly with single-step compliance testing and long-range precision. The system measures straightness, parallelism, and squareness in one setup, reducing errors and saving time. Paired with Renishaw’s CARTO XK20 app, it offers guided workflows for operators of all skill levels. Built-in ISO compliance and audit-ready reporting give manufacturers confidence while future updates promise even broader functionality, ensuring long-term return on investment.
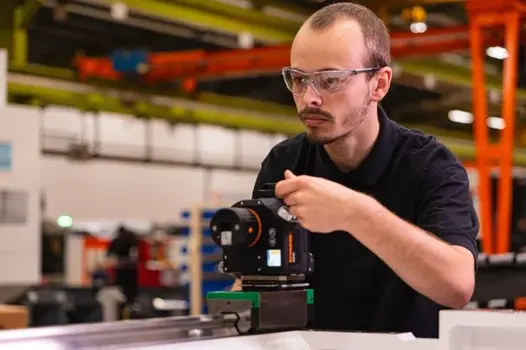
An operator using the XK20 alignment laser system.
An operator using the XK20 alignment laser system. Image used courtesy of Renishaw
An operator using the XK20 alignment laser system. Image used courtesy of Renishaw
Features That Matter
At the heart of the system is its ability to measure straightness across unlimited axis lengths. That matters for gantry machines, long-bed mills, and other equipment where older optical tools struggled to hold accuracy over distance. Engineers can now check parallelism and squareness with the same setup, removing the need to switch tools mid-build. The hardware pairs with the CARTO XK20 app, available on Android devices or Renishaw’s own rugged display unit. The app provides a guided workflow with images and animations. That guidance makes it possible for less experienced operators to achieve consistent results while offering the depth of control that experts expect.
Renishaw has also laid out a roadmap. Future updates will extend the app to measure flatness, spindle direction, and coaxiality. This means the tool you buy today can take on more tasks tomorrow, keeping the return on investment growing over time.
Why One-Step Testing Changes the Equation
Earlier systems required up to three steps to measure across the 30 MHz to 1 GHz range. The XK20 condenses that into a single operation. Cutting out
extra stages reduces the time needed for compliance testing and lowers the risk of compounding measurement errors.
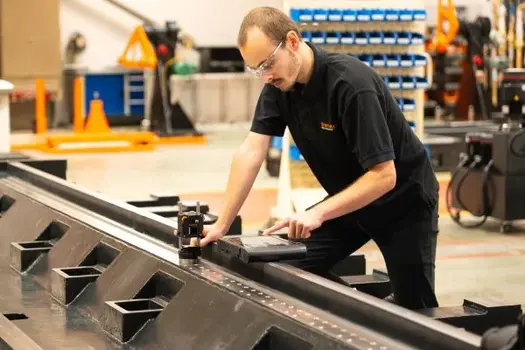
An operator using the advanced long-range measurement mode on the XK20 laser system.
An operator using the advanced long-range measurement mode on the XK20 laser system. Image used courtesy of Renishaw
An operator using the advanced long-range measurement mode on the XK20 laser system. Image used courtesy of Renishaw
For production teams, this shift translates into faster throughput and fewer opportunities for mistakes. Compliance data is stored in one place, making it easier to track, review, and present during audits. What once demanded hours can now be wrapped up in one session.
Built-In Compliance Capability
Machine builders must prove their tools meet strict ISO standards, especially when exporting to global markets. The XK20 incorporates those requirements directly into its workflow. Instead of running separate checks or relying on third-party validation tools, operators can generate audit-ready data as part of the normal assembly process. That design reduces duplication and gives companies more confidence that their builds will pass inspection the first time. It also improves documentation, since all test records are linked to the same platform, providing a clear trail for regulators or end customers.
Closing the Gap
Machine tool makers know precision is not optional, but legacy alignment methods have slowed progress. Renishaw’s XK20 system closes that gap. Combining long-range repeatability, one-step compliance testing, and ISO-ready reporting in a single package enables manufacturers to shorten build cycles without giving up accuracy. For an industry that runs on speed and precision, the XK20 shifts the balance toward both.
Renishaw has launched the XK20 alignment laser, designed to simplify and accelerate machine tool assembly with single-step compliance testing and long-range precision. The system measures straightness, parallelism, and squareness in one setup, reducing errors and saving time. Paired with Renishaw’s CARTO XK20 app, it offers guided workflows for operators of all skill levels. Built-in ISO compliance and audit-ready reporting give manufacturers confidence while future updates promise even broader functionality, ensuring long-term return on investment.

An operator using the XK20 alignment laser system.
An operator using the XK20 alignment laser system. Image used courtesy of Renishaw
An operator using the XK20 alignment laser system. Image used courtesy of Renishaw
Features That Matter
At the heart of the system is its ability to measure straightness across unlimited axis lengths. That matters for gantry machines, long-bed mills, and other equipment where older optical tools struggled to hold accuracy over distance. Engineers can now check parallelism and squareness with the same setup, removing the need to switch tools mid-build. The hardware pairs with the CARTO XK20 app, available on Android devices or Renishaw’s own rugged display unit. The app provides a guided workflow with images and animations. That guidance makes it possible for less experienced operators to achieve consistent results while offering the depth of control that experts expect.
Renishaw has also laid out a roadmap. Future updates will extend the app to measure flatness, spindle direction, and coaxiality. This means the tool you buy today can take on more tasks tomorrow, keeping the return on investment growing over time.
Why One-Step Testing Changes the Equation
Earlier systems required up to three steps to measure across the 30 MHz to 1 GHz range. The XK20 condenses that into a single operation. Cutting out
extra stages reduces the time needed for compliance testing and lowers the risk of compounding measurement errors.

An operator using the advanced long-range measurement mode on the XK20 laser system.
An operator using the advanced long-range measurement mode on the XK20 laser system. Image used courtesy of Renishaw
An operator using the advanced long-range measurement mode on the XK20 laser system. Image used courtesy of Renishaw
For production teams, this shift translates into faster throughput and fewer opportunities for mistakes. Compliance data is stored in one place, making it easier to track, review, and present during audits. What once demanded hours can now be wrapped up in one session.
Built-In Compliance Capability
Machine builders must prove their tools meet strict ISO standards, especially when exporting to global markets. The XK20 incorporates those requirements directly into its workflow. Instead of running separate checks or relying on third-party validation tools, operators can generate audit-ready data as part of the normal assembly process. That design reduces duplication and gives companies more confidence that their builds will pass inspection the first time. It also improves documentation, since all test records are linked to the same platform, providing a clear trail for regulators or end customers.
Closing the Gap
Machine tool makers know precision is not optional, but legacy alignment methods have slowed progress. Renishaw’s XK20 system closes that gap. Combining long-range repeatability, one-step compliance testing, and ISO-ready reporting in a single package enables manufacturers to shorten build cycles without giving up accuracy. For an industry that runs on speed and precision, the XK20 shifts the balance toward both.

